How to Grow Microgreens at Home
Welcome to the first post in the series Yardibles guide to growing microgreens at home. Growing microgreens at home is simple if you have the right tools. With just a few simple steps you will learn how to grow microgreens at home.
My posts may contain affiliate links. If you purchase something from one of our links we may earn a small commission, doesn’t cost you any more but helps us to bring you more great tips, recipes and garden ideas. Also, as an Amazon Associate, I earn from qualifying purchases.
Step 1: Decide on What Trays You Will Want to Use
There are a few popular trays you can use to grow microgreens. Professional growers use what are called 1020 trays because they are 10″ x 20″ long. You can get them with and without holes. You most likely will need to purchase both types.
When growing microgreens it is recommended for most varieties of seeds to water from the below. For this setup, you will be seeding in the tray with the holes, then setting that top tray (with holes) into the bottom tray (without holes). The water will be added to the bottom tray, the roots will grow down through the holes of the tray above reach the water below. This helps to keep the roots healthy and helps to avoid health issues.
Over the past decade, the 1020 trays have been the most popular trays to use for growing microgreens. Recently there have been more innovations and more choices for growing food indoors. We found that these smaller trays are easier to clean and fit nicely into smaller spaces.
Each set comes with a white top tray with holes, and a green solid bottom tray to hold water.
Set of 5 Easy to clean microgreen / sprouting trays

Growing microgreens is a great way to grow superfoods at home in a small space. We also love that these trays are the perfect size for beginner growers. If things start to go bad in these smaller trays, your loss is minimal. Did I mention, these are also BPA free! But don’t worry, we will be guiding you the entire way, including tips and tricks for successful harvests.
You can also use old containers – food takeout containers work great, as well as plastic containers from strawberries, mushrooms, etc. If they do not have holes in the bottom of the trays, you can easily add some yourself. Shallow trays work better for growing and harvesting than deeper trays.
Step 2: Wash and Disinfect Your Trays
Starting with nice clean, sterilized trays are your best bet for an easy grow. By eliminating any bacteria or fungus spores that may be present from previous grows, you will greatly increase your chances of a healthy tray of microgreens. Things like dampening off, mold, and other plant diseases can take hold quickly. This is a great way to ensure an easier microgreens journey.
Wash the trays well
First, you will need to remove dirt and debris by washing your trays with soap and using a good scrub brush like this nice bamboo one:

Disinfect the trays:
After your trays are sparkling clean, you can disinfect the trays using one of the following methods. I am not a fan of bleach and have read many studies that hydrogen peroxide works just as well and is much safer to use. But with all chemicals, please read the directions and take precautions before using them.
Below is a list of various methods in order from the best bet to killing off the nasties to the least effective. Choose which method works well for you. I always recommend wearing gloves to protect your hands when disinfecting your trays. ( Unless you choose the last option below)
– Disinfect Using Hydrogen Peroxide (My first choice)
Spray the trays with 3% food grade hydrogen peroxide and set aside to dry completely. You can also fill a bucket with a 3% hydrogen peroxide solution and soak them for 10-20 minutes before setting out to dry.
– Disinfect Using Bleach – (Please be careful if using bleach)
In a large bucket or another container, add bleach at a ratio of 1 part bleach to 10 parts water. Place your trays into the solution and soak for 10-20 minutes, then remove and set out to dry. (Remember, bleach is can be highly toxic so please handle and use with care)
– Disinfect Using Vinegar
Spray the trays with a water & vinegar mix and set aside to dry completely.
– Disinfect Using The Sun
After you have thoroughly cleaned your trays, set them out in the direct sun. The sun can also sterilize the trays but may vary by the day, temperature, etc. So may not be a guaranteed way of disinfecting.
Step 3: Prepare the Planting Medium for the Microgreens
There are a few different planting mediums you can use to grow microgreens. If you go to Youtube, you will find lots of different ways to grow them. Some people use Organic Coconut Coir ( one of my favs), a high-quality potting soil, hydroponic grow mats or no medium at all.
You can also use a combination of different growing mediums such as a 50/50 mix of coconut coir and potting mix. Sometimes it depends on what you have on hand at the time and what is available in your area.

If you choose to use coconut coir, it comes in these large bricks pictured above. One brick can do many, many, many trays. You will need to first soak the brick in water. I use a flat head screwdriver to remove smaller chunks at a time depending on how many trays I am planting that day.
Soak the chunks in water until the block begins to soak up water. Grab a handful of the coir and gently squeeze most of the water out until it is like a wet sponge. If using the green trays pictured earlier in the post, spread about 1/2-1″ of material into the white tray with the holes.
Step 4: Sowing Your Microgreen Seeds:
Some seeds can be seeded immediately, some may benefit from a quick soak, others from sprouting before planting. We will be providing cheat sheets for each type of microgreen over the next few months so be sure to subscribe so you do not miss a thing!
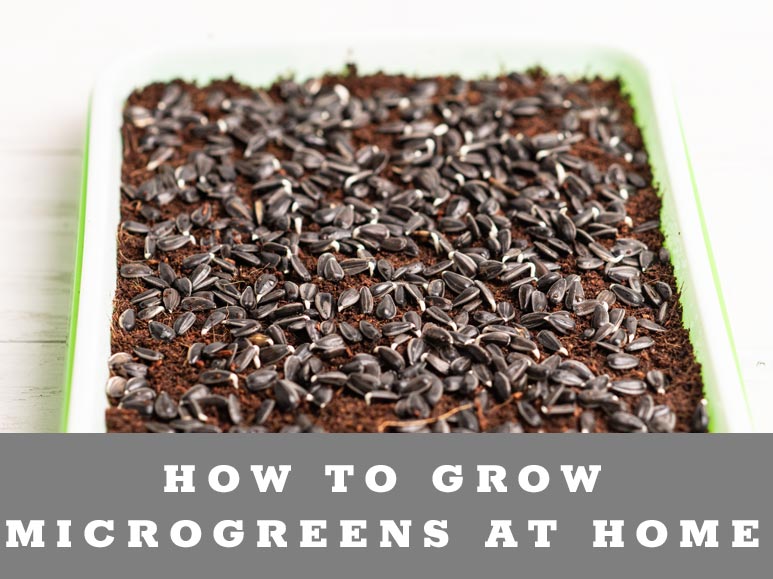
Measure out your microgreen seeds, and spread evenly on top of the coir. Some people spread them by hand, use an old spice or cake sprinkles container, or use a drinking glass or a measuring cup.
After the seeds have been evenly distributed, using a squirt bottle filled with water and 3% food grade hydrogen peroxide mix (1 tsp per gallon of water), spray the seeds until they are lightly soaked. The hydrogen peroxide mix is another extra protection to kill off any fungus or mold spores that may be present on your seeds. Cover your seeds and put in a dark, well-ventilated space for 1-4 days depending on the variety you are planting.
There are many tricks and tips that are seed-specific that we will be going over in the next few months here on the blog. We will be adding instructions on various types of microgreens from planting wheatgrass, to peas, sunflower, broccoli, radish, and more.
Step 5: Growing Your Microgreens
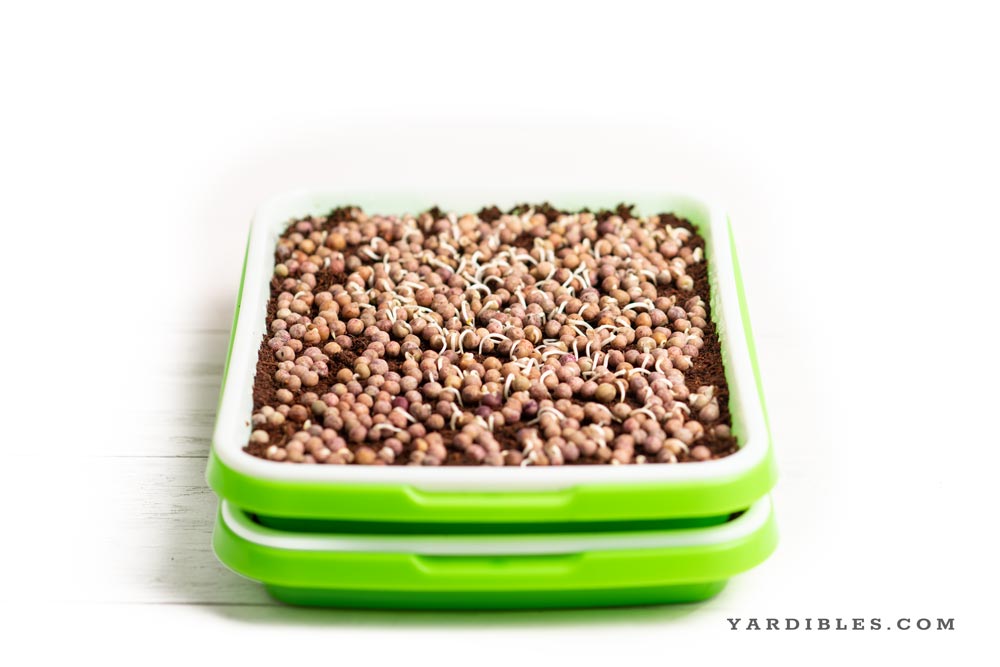
Check on your seeds a couple times a day. I like to check on them first thing in the morning and before I go to bed each night. If it looks like the medium is dry, use your squirt bottle again to moisten the seeds. I usually spray them 1-2 times a day depending on the time of year.
Once your seeds have germinated and have started to push upwards, it is time to move them into the light. This can be a dedicated growing shelf with lights or a simple kitchen window. These microgreens grow so fast you can practically watch them grow. At this point, you will want to add water to the bottom green tray so that the water reaches the microgreens roots. Again, I check twice a day and water as necessary.
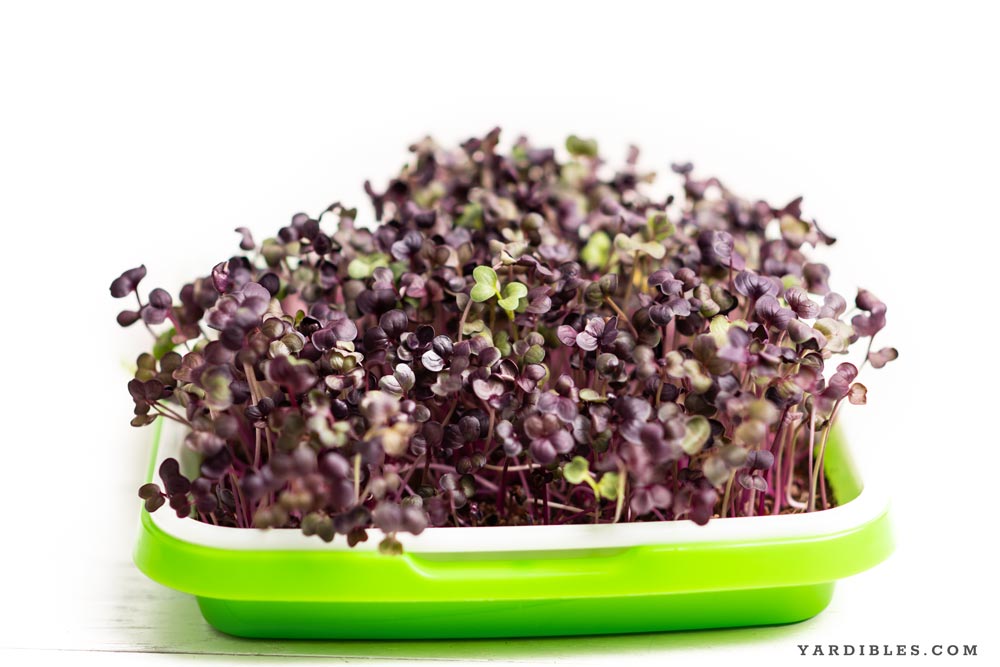
After another 2-5 days, your microgreens will be ready to harvest. We purchased this great microgreens harvesting knife which makes cutting the trays a breeze.

Once cut, the microgreens can be stored in your refrigerator for 1-3 weeks depending on the variety grown and the conditions in your home. Let me know if you have any great tips and tricks for growing microgeens at home.


One Comment
Dom Uguccioni
This is a wonderful start to finish guide, thank you for sharing! I definitely notice the difference between locally grown produce compared to stuff you buy at grocery stores, resources to do more yourself are wonderful!