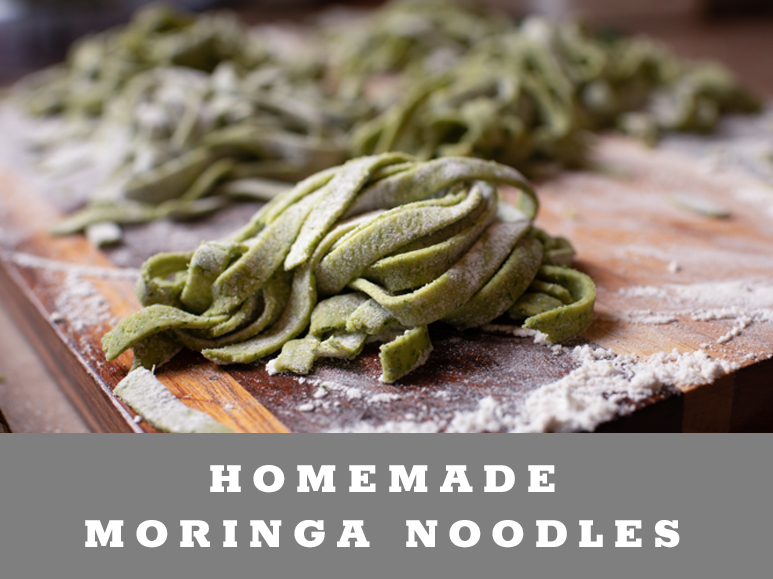
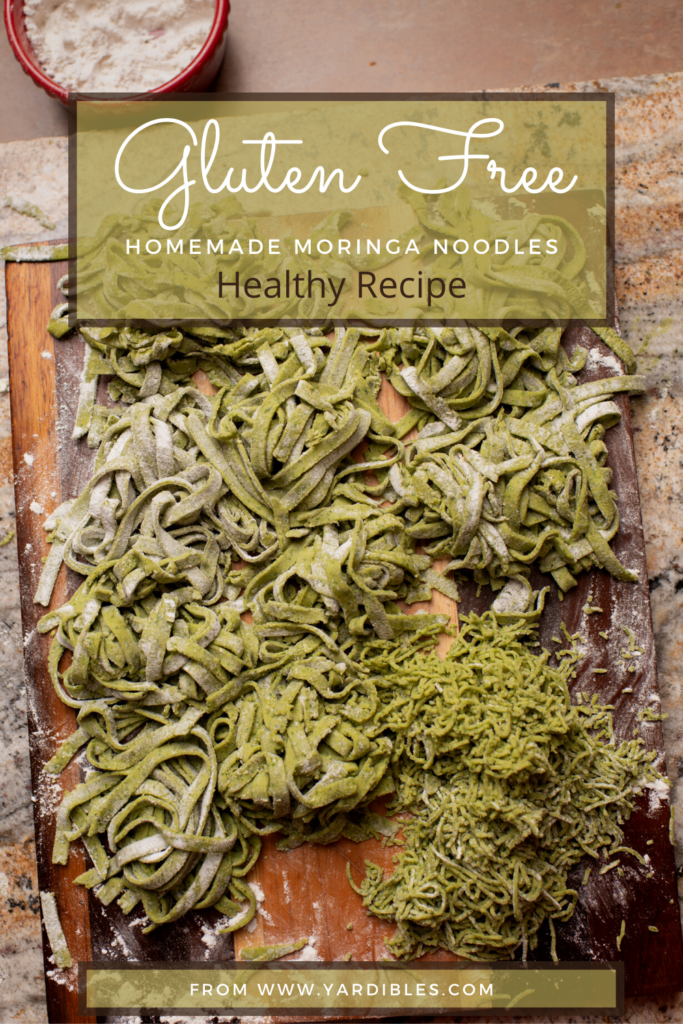
Homemade Gluten Free Moringa Noodles Recipe
When you have to go gluten-free, either by choice or for health reasons, there is a pretty big learning curve ahead of you. Making pasta, bread, muffins, and pancakes never seems to be as easy or the same. I have spent a few years in the kitchen to perfect some gluten-free recipes for my husband. Here is one of our absolute favorites: Gluten Free Moringa Noodle Recipe
My posts may contain affiliate links. If you purchase something from one of our links we may earn a small commission, doesn’t cost you any more but helps us to bring you more great tips, recipes and garden ideas. Also, as an Amazon Associate, I earn from qualifying purchases.
A Little About Moringa
Before I spill my secrets on how to make gluten=free moringa noodles, let me tell you a little about moringa. Moringa, also called the drumstick tree, miracle tree, and many other names. It is rich in micronutrients, calcium, vitamin C, potassium and so much more. Here at Yardibles, I have about 5 moringa trees growing in the backyard. These are great trees to plant in Arizona for almost instant shade. Since they grow about 3-5ft a month, you can have a 15ft high tree in one season when planted from seed.
For more information about Moringa, check out this post:
Related Article:
How to make Homemade Gluten Free Moringa Noodles:
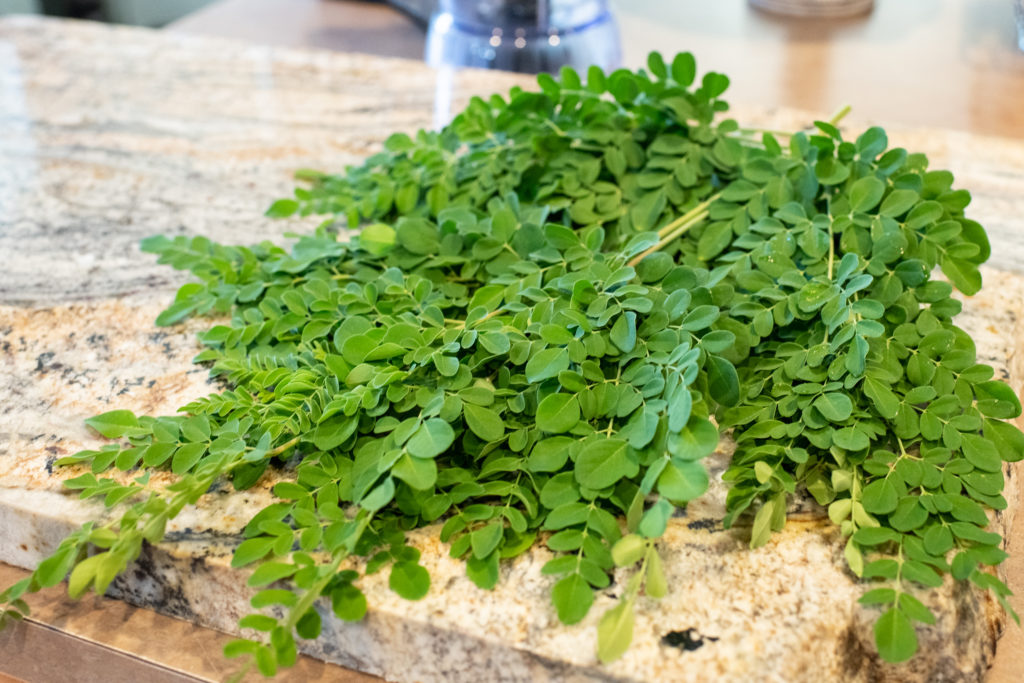
The first step in making these gluten-free, super nutritious noodles, is to harvest some leaves. We picked about 4-5 small branches off one of Yardibles moringa trees. If you do not have access to fresh moringa, you can also use moringa powder in this recipe, Although I have not tried to use it dried, it should work the same. Just skip the next 2 steps and add it dry to the flour. You may need to add extra eggs or water to make up the difference in moisture.
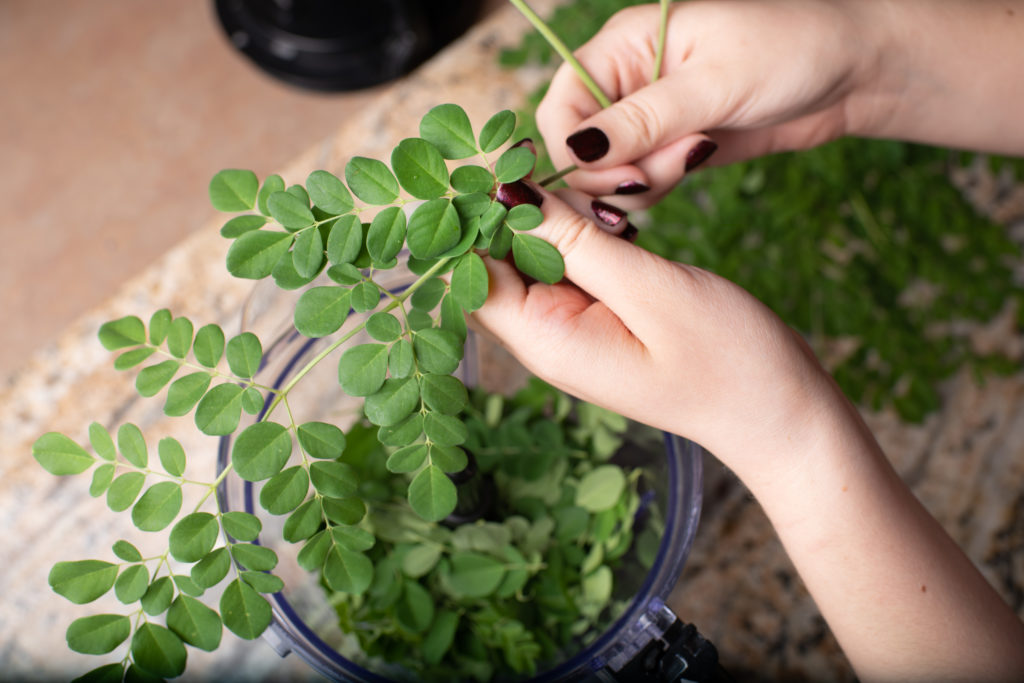
Step 2: Remove the Leaves
The next step in the recipe is to remove the leaves from the main stem. We find it easiest to run your hand down the length of the stem, from the cut end to the tip. Do not worry about the smaller stems if they come off with the leaves, these will all grind up well for the puree.
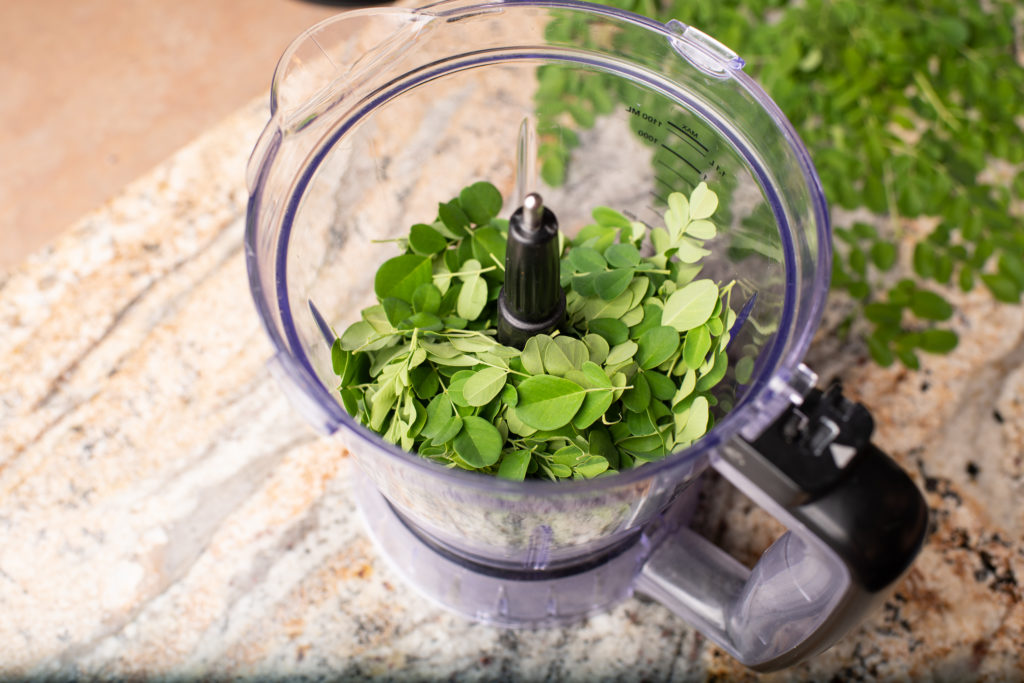
Step 3: Wash & Puree the Moringa Leaves
Make sure to wash your fresh moringa leaves, then place them in a mixer, blender or food processer. I like to use my Ninja for making the moringa puree. You will need to add some water to the blender as well. I started with about 3/4 of a cup of water. Add a little more at a time if you are having a hard time making a smooth puree. We made about 1 cup of puree for this recipe. Set aside.
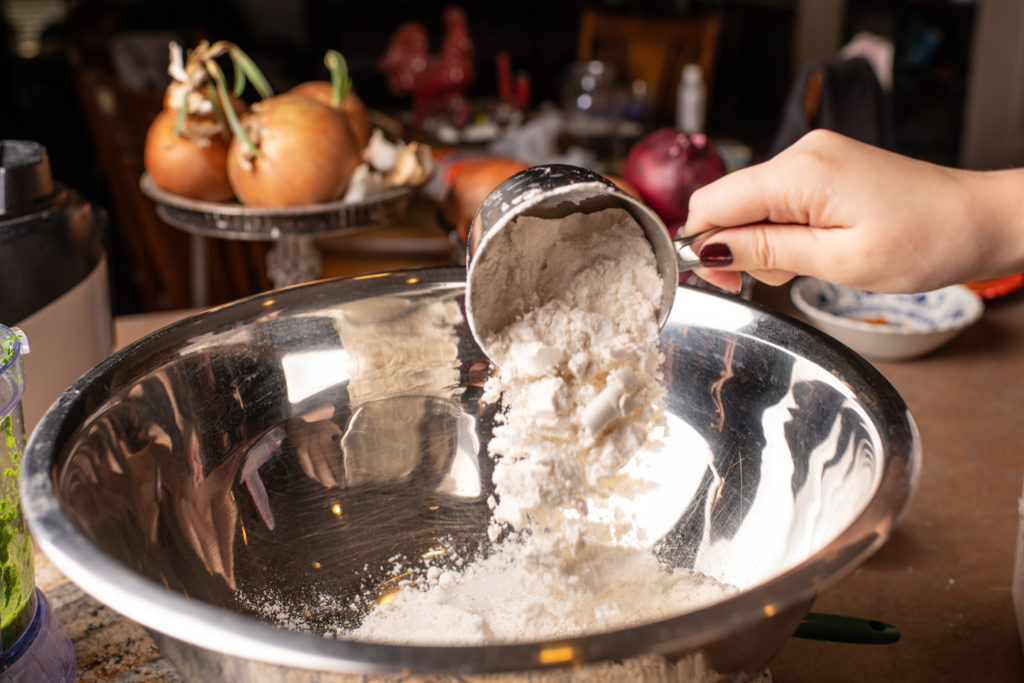
Step 4: Prepare your Dough
The best way to make noodles is by weighing your flour. With normal, non-gluten free noodles, you would use 200g of flour for every 2 eggs. Since gluten-free flours seem to absorb moisture differently, we need to adjust that formula a little. Here we started out with 400g of flour. We love our digital kitchen scale for weighing out our ingredients. This is the scale that I have and I love it! I use it almost daily! I still have my old one that is over 12 years old and besides the fact that one of the button covers fell off, it still works great!

Digital Scale 11 lbs. or 5 kg with LCD Display and Sealed Buttons
I used Bob’s Red Mill Gluten Free 1-to-1 Baking Flour in this recipe and the pasta turned out perfect!
Step 5: Add Eggs & Moringa Puree
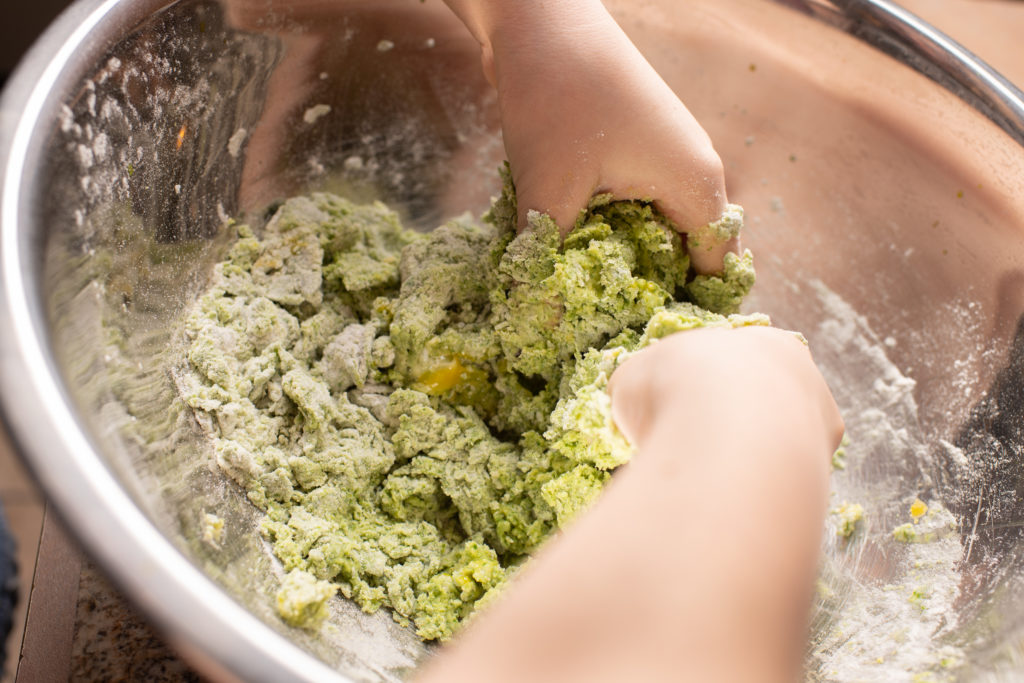
Because gluten-free flour differs in texture and absorption than its gluten toting counterparts, We started out by adding 3 eggs, then the moringa puree.
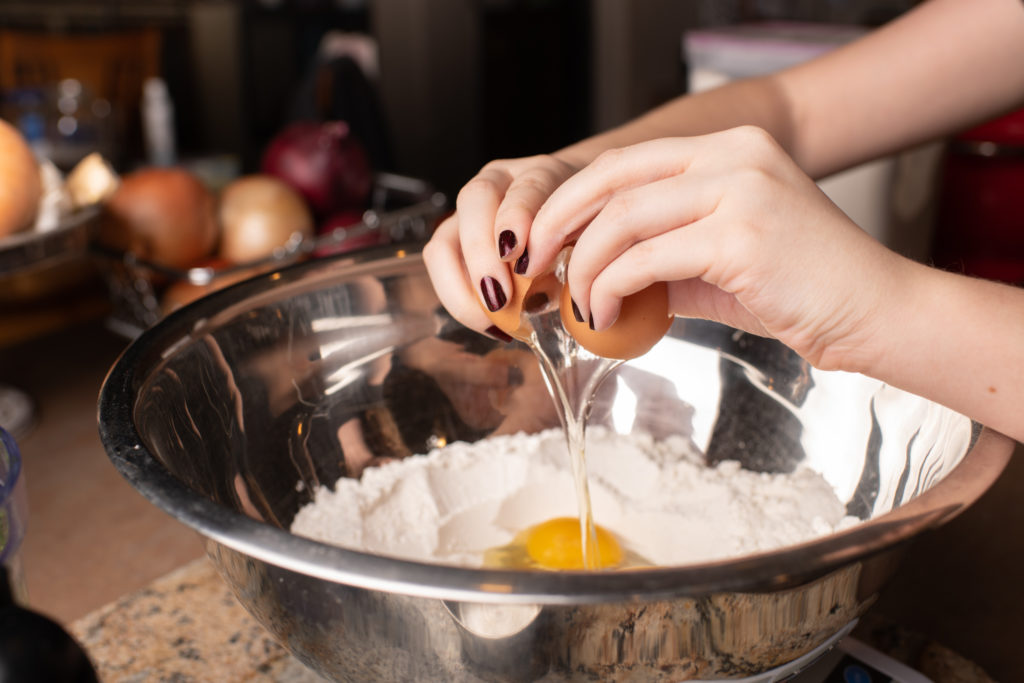
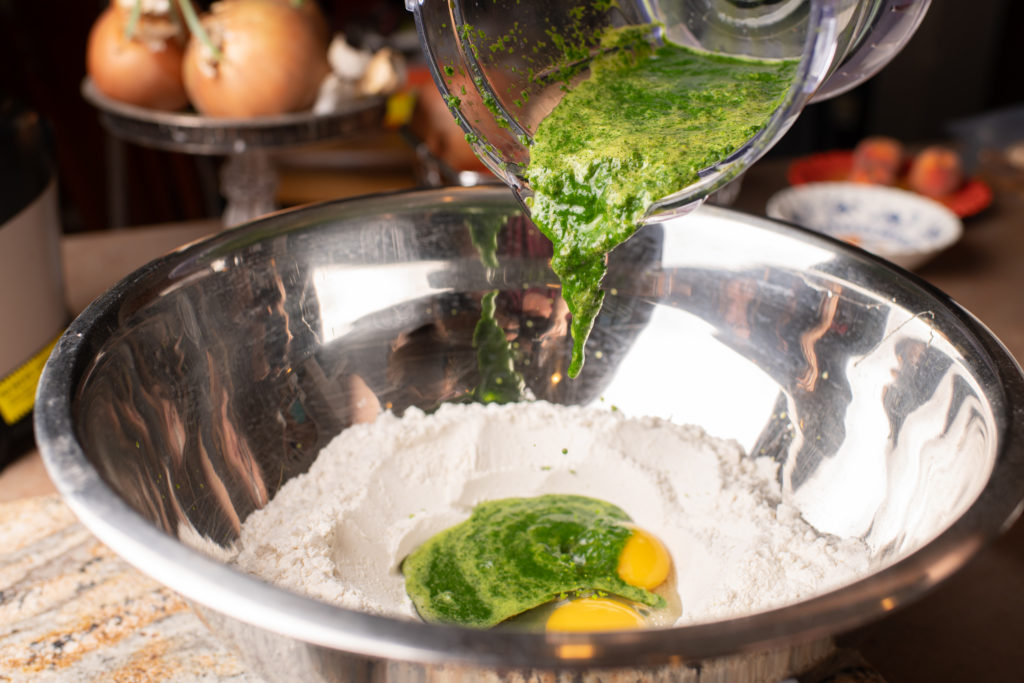
Once you start to mix the dough, you can judge whether or not you need to add an additional egg. This also depends on the amount of puree you are adding to the mix. For this recipe, we added an additional egg for a total of 4 eggs. Mix the ingredients together until mostly combined.
Step 5: Gently Knead the Dough
Dump the dough onto a clean surface and knead until all the flour is incorporated and you can make a ball with the dough. You do not want the dough to be too sticky, or too dry. you can add extra flour, or a few drops of water at a time until you reach the correct consistency.
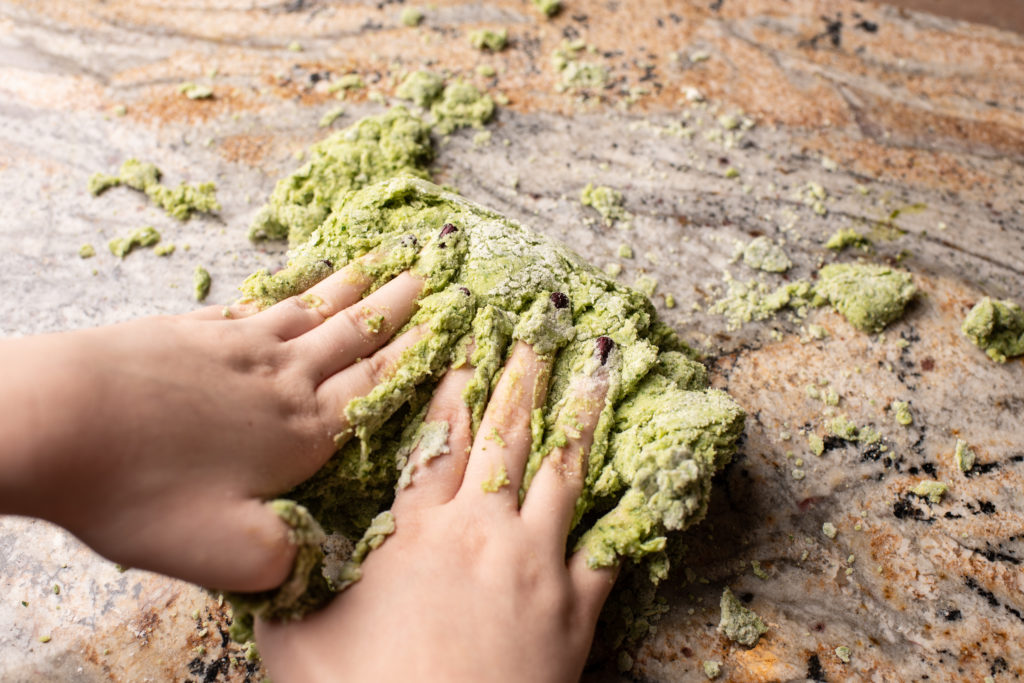
When you are making noodles with your artistic teenage daughter, you may end up a dough ball that somewhat resembles Jabba the Hut.

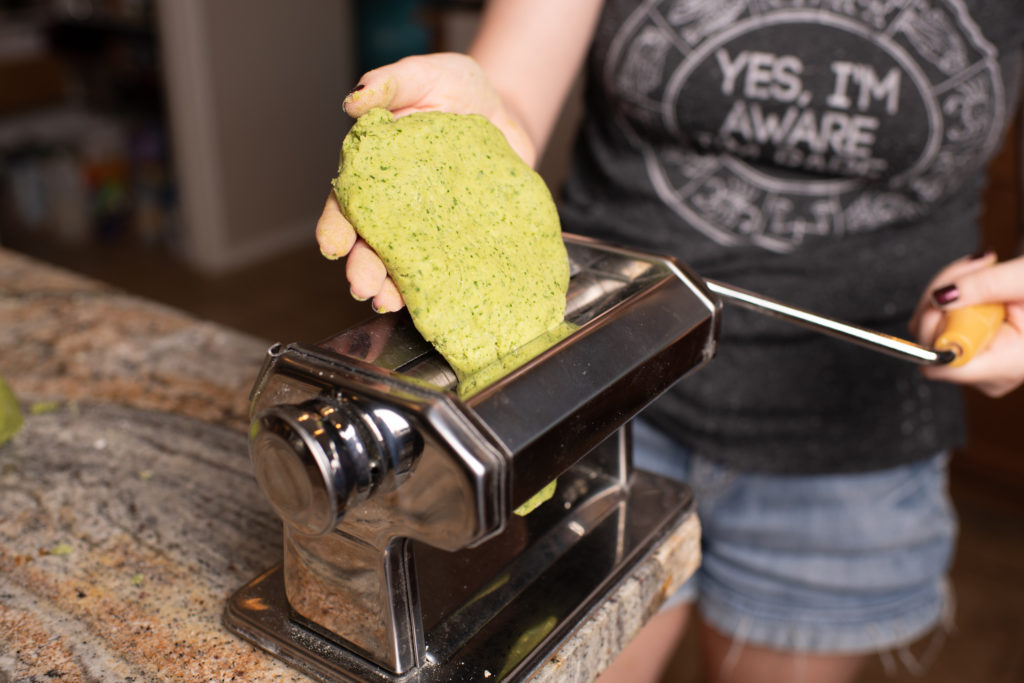
Step 6: Divide Dough & Run Through a Pasta Maker
When making noodles, there are two ways to go about it. You can use a pasta maker as we did in the image below, or you can roll out the dough and hand-cut the noodles. We choose to use my pasta maker when we made this batch. One thing to remember, this is gluten-free dough, and although it did run through the machine just fine, some of the noodles broke coming out the other side. Next time, I think we are going to roll the dough thin and hand-cut the noodles.
Growing up, my mom would make us homemade egg noodles. She would make a large batch at a time and freeze them. I remember every flat surface in the kitchen and dining room being covered with hundreds of hand-cut egg noodles.
If you choose to use a pasta maker, you will first want to divide your dough into smaller sections. Set your pasta maker to the widest setting and run the dough through. Next, reduce the size of the rollers and run through again until you achieve your desired thickness for your noodles. If your dough is too moist, dust each side with your gluten free flour before running through the machine. You can do this which each pass if you need to.
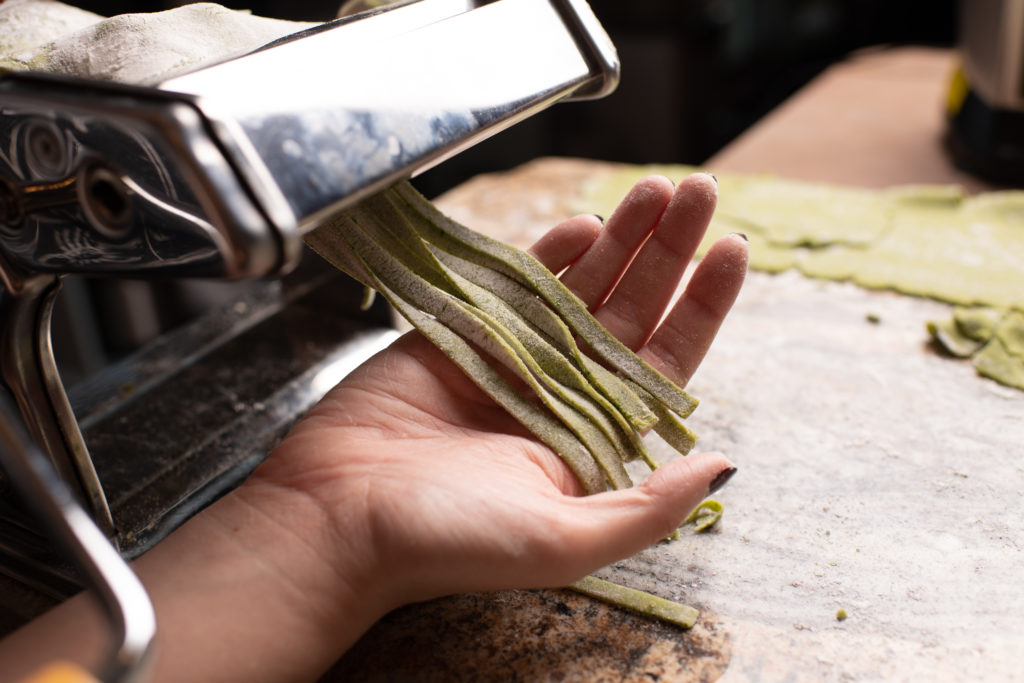
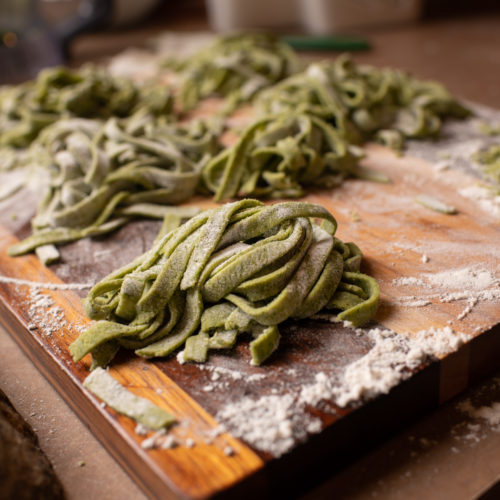
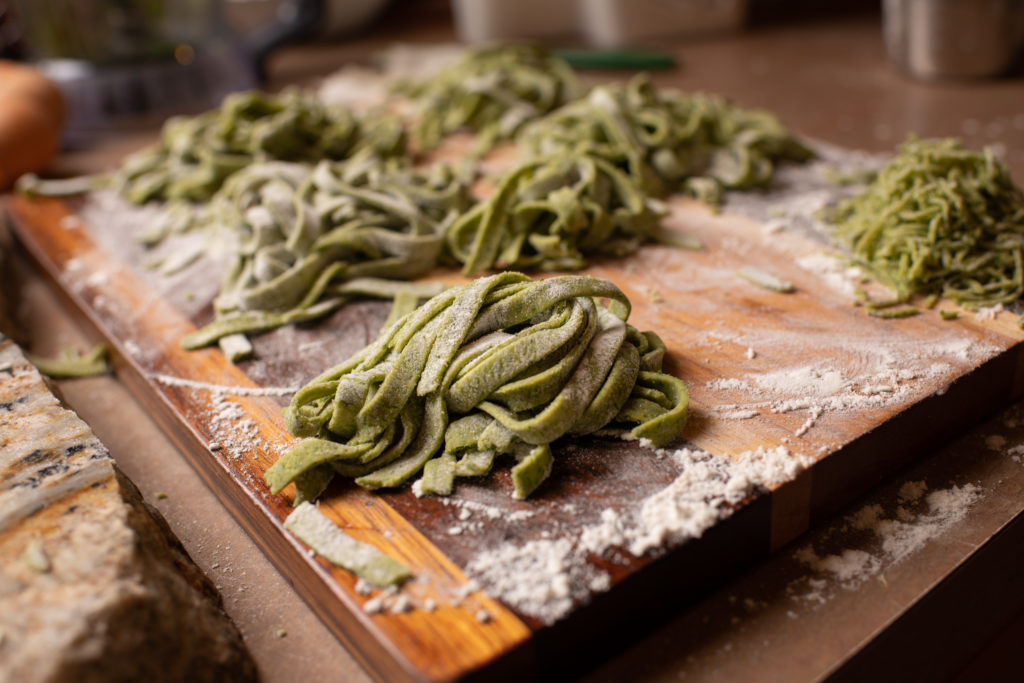
Step 8: Cut the Moringa Noodles
You should now have some nice flat, thin sheets of dough. You will need to attach the noodle cutting accessory to your pasta machine. Run each sheet again through the setting you choose. We made wider egg noodles as pictured below. My daughter also wanted to try the spaghetti cutters, so we made a sheet and a half of those as well to add to soups.
Step 9: How to Store Homemade Gluten Free Moringa Noodles:
Now that you have all the noodles cut and either laid out to dry or curled in little batches on your counter, you have to decide whether or not you want to cook immediately, freeze, or dry for later. After you have been starring at these beautiful noodles for the last hour or so, you will be tempted to have them for dinner.
These cook up quickly and easily. You just add your noodles, a few at a time to a pot of boiling water. After about 2 minutes, they will begin to float to the top. That indicates that they are cooked and ready to be removed from the pot.
Stay tuned for a fabulous recipe using garlic, butter, and fresh veggies.
To freeze these, you can lay them out onto parchment or freezer paper lined cookie sheets. Place the trays into the freezer for 3-6 hours or until frozen solid. Once you remove the trays from the freezer, you can pack them into freezer safe bags or containers. These should store in the freezer for up to 6 months.
The final way to preserve these homemade gluten free moringa noodles for future meals is by drying them. Egg noodles can be dried by leaving them out for a few days (laid out side by side, not in piles like the image below) until crispy, or placed into a dehydrator. Because these contain eggs, it is best to consume them within about 2-3 months for optimum taste.
Homemade Gluten Free Moringa Noodles
Equipment
- Pasta Maker
Ingredients
- 400 g Bob's Red Mill 1 to 1 Gluten Free Flour
- 3-4 eggs
- 1 cup moringa puree from 3-4 small branches
- 1 cup Water as needed
- Extra gluten free flour for dusting
Instructions
- Harvest moringa branches, remove leaves. Wash Moringa leaves and place in a blender or food processor. Add 1/2 cup of water to start. Blend on high for 1 minute or until mixture is smooth. You may need to add a little more water if the mixture is too dry to blend. Set Aside.
- Measure out 400g of Bob's Red Mill Gluten Free 1 to 1 Flour. Place flour in a large mixing bowl.
- Form a well in the middle of the flour and add 3 large eggs and moringa puree. Mix well. You may need to add an extra egg and or a bit of water to make sure the flour is fully incorporated into the dough. You want the dough to stick together without being sticky.
- Dump the mixture onto a clean surface. Knead the dough until it forms a smooth ball.
- Divide the dough into 4 or 5 pieces. Run each piece through a pasta maker at the widest setting to form a thick sheet. Lightly dust the sheet with flour, reduce the thickness and run the dough back through.
- Once you have achieved your desired thickness, attach the noodle cutting accesory. Run your pasta sheets through the cutting roller you prefer. Gently lay pasta on a clean towel or flour sack.
- To cook the noodles: Bring a large pot of water to a boil over medium high heat. Drop the noodles in a few at a time. Cook for 1-2 minutes. Once the noodles start to float, they are done. Drain & serve with your favorite sauce and vegetables.
Notes

You May Also Like

Roasted Tomatillo Salsa Verde

Healthy Pizza With a Twist